


What Is the Snipping Tool Shortcut?
The snipping tool shortcut is one of the fastest ways to capture screenshots on a Windows computer. Instead of opening the Snipping Tool application manually, you can instantly activate the screen capture interface with a simple keyboard combination. This saves time and makes taking screenshots much more efficient.
Microsoft introduced the modern Snipping Tool to replace the older Snipping Tool and Snip & Sketch applications. The updated version combines the best features of both, offering an easy-to-use interface with improved editing tools and faster access. Whether you’re a student, professional, gamer, or casual PC user, learning this shortcut can improve your workflow.
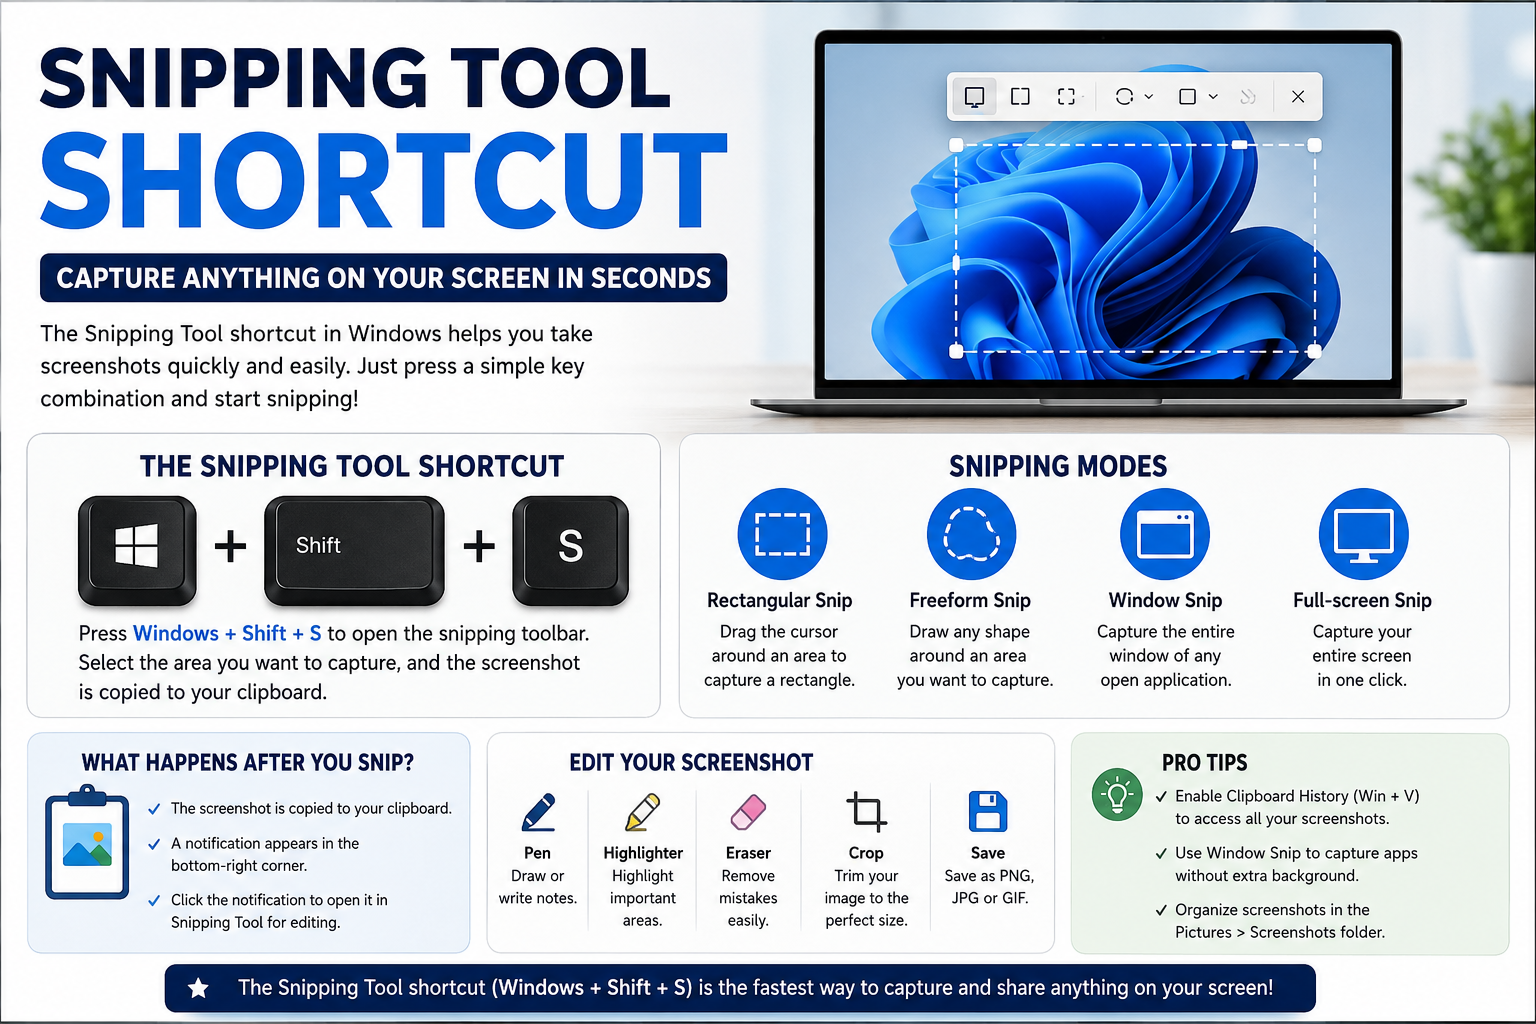
The most commonly used snipping tool shortcut is Windows + Shift + S. Pressing these keys together immediately darkens your screen and lets you select the area you want to capture. The screenshot is copied to your clipboard and can also be edited in the Snipping Tool application.
Why the Snipping Tool Shortcut Is So Useful
One of the biggest advantages of using the snipping tool shortcut is speed. Instead of searching through the Start menu or opening multiple applications, you can capture your screen within seconds. This is especially helpful when you need to save information quickly before it disappears.
The shortcut is also incredibly versatile. You can capture a small section of your screen, a specific window, or the entire display. This flexibility makes it useful for creating tutorials, reporting software bugs, saving online receipts, or sharing information with coworkers.
Another benefit is that the screenshot immediately becomes available in your clipboard. You can paste it directly into emails, documents, chat applications, or image editors without saving the file first. This simple feature saves valuable time throughout the day.
How to Use the Snipping Tool Shortcut
Using the snipping tool shortcut is straightforward. Simply press Windows + Shift + S on your keyboard. Your screen will dim slightly, and a small toolbar will appear at the top of your display with several screenshot options.
The first option allows you to capture a rectangular area by dragging your cursor across the desired section. This is the most popular mode because it lets you select only the information you need without including unnecessary parts of the screen.
The toolbar also offers freeform snipping, window snipping, and full-screen capture. After taking the screenshot, Windows displays a notification. Clicking the notification opens the Snipping Tool editor, where you can crop, annotate, highlight, or save the image.
Different Screenshot Modes Available
The Snipping Tool offers several screenshot modes that make the snipping tool shortcut suitable for almost any situation. Each mode serves a different purpose depending on what you’re trying to capture.
Rectangular Snip is the default option and is perfect for selecting a precise portion of your display. It provides clean screenshots that focus only on the important content, making it ideal for guides, presentations, and documentation.
Window Snip captures an entire application window with a single click, while Full-Screen Snip captures everything visible across your monitor. Freeform Snip lets you draw an irregular shape around the content you want, which can be useful for highlighting specific objects or images.
Editing Screenshots After Capturing Them
Taking the screenshot is only the beginning. The built-in editor provides several tools that help improve your images before sharing them. Once you click the notification, the screenshot opens inside the Snipping Tool application.
You can use the pen tool to circle important areas, write notes, or draw arrows. Different colors allow you to highlight specific details, making screenshots easier to understand for coworkers, classmates, or readers.
The editor also includes a highlighter, eraser, ruler, and cropping tools. These features eliminate the need for third-party editing software in many situations. After editing, you can save the image in PNG, JPG, or GIF format depending on your needs.
Tips for Getting the Most Out of the Snipping Tool Shortcut
To make the most of the snipping tool shortcut, consider learning additional Windows keyboard shortcuts that complement it. Combining keyboard shortcuts allows you to work much faster, especially when multitasking.
Organizing your screenshots into clearly named folders also improves productivity. Instead of leaving images with generic filenames, create folders for work, school, personal projects, or tutorials so they’re easier to locate later.
It’s also worth enabling clipboard history in Windows. This feature allows you to access multiple recently copied screenshots instead of only the latest one. It can significantly improve efficiency when working with several images at once.
Common Problems and How to Fix Them
Sometimes the snipping tool shortcut may stop working due to Windows updates, disabled keyboard shortcuts, or software conflicts. Fortunately, most issues are relatively easy to resolve.
The first step is restarting your computer. Temporary system glitches often disappear after a reboot. If the problem continues, check whether Windows is fully updated because Microsoft regularly releases fixes for built-in applications.
You can also reset or repair the Snipping Tool by opening Windows Settings, navigating to Installed Apps, selecting Snipping Tool, and choosing the Repair or Reset option. This often resolves persistent problems without requiring a complete reinstall.
Other Useful Screenshot Shortcuts in Windows
Although the snipping tool shortcut is the most flexible screenshot method, Windows includes several additional keyboard shortcuts worth learning. Each serves a slightly different purpose depending on your needs.
Pressing the Print Screen (PrtScn) key captures your full display and copies it directly to the clipboard. You can then paste the screenshot into applications like Microsoft Word, Paint, or messaging platforms.
Using Windows + Print Screen automatically saves a full-screen screenshot into the Screenshots folder inside your Pictures directory. Meanwhile, Alt + Print Screen captures only the currently active window, making it useful when working with multiple open applications.
Who Should Use the Snipping Tool Shortcut?
The snipping tool shortcut is valuable for almost every Windows user. Students frequently use it to capture lecture slides, research materials, and online resources while studying or completing assignments.
Professionals benefit from quickly sharing software issues, documenting workflows, creating presentations, or communicating visually with team members. Screenshots often explain problems more effectively than long written descriptions.
Content creators, bloggers, and technical writers also rely heavily on this shortcut when producing tutorials and guides. High-quality screenshots improve reader understanding and make instructional content much easier to follow.
Final Thoughts on the Snipping Tool Shortcut
Learning the snipping tool shortcut is one of the simplest ways to improve your daily productivity on Windows. With just Windows + Shift + S, you gain instant access to a powerful screenshot tool that supports multiple capture modes and built-in editing features.
Instead of relying on complicated software or taking unnecessary full-screen captures, you can create clean, professional screenshots in seconds. The built-in editing tools further simplify the process by allowing quick annotations, cropping, and highlighting before sharing your images.
Whether you use your computer for work, education, gaming, or everyday browsing, mastering the snipping tool shortcut will save time and make capturing important information faster and more convenient. With regular use, it quickly becomes one of the most valuable keyboard shortcuts available in Windows.